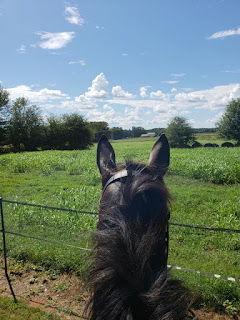
We got there early and did a little hack to the field. As I was putting my phone back in the case I dropped it. Sigh.. so I had to get off and get it. And there's not really a mounting block out there. So... we walked back a little bit and there was a pile of downed tree branches. Big branches. I thought... "hmm.. this might work". I walked up to a big branch that was knee height and went to put my weight on it. It totally wiggled and moved the big pile, but Dan stood still, so... I shook it a few times and told him he was good. (Not that he seemed to care anyways) and then I pulled him over and hopped on. Super horse!!
So then we got back to the ring for our lesson. We warmed up and then we started the leg yield work. We started with regular leg yielding and Beth said that I needed to let his shoulders lead for a stride or too to get him started, and then bring the haunches along. When I did that we had a pretty good leg yield. So then we tried the zig zag and coming out of the corner. Basically what it boiled down to was he's not as quick and easy of my right leg (DUH!) as my left leg and I was shutting the leg yield left down by holding the outside rein too much. So... after multiple attempts and me figuring out one step at a time... here is the giant list of steps that Holly must think about and accomplish to have an effective and mostly proper leg yield. :) (oh, and part of the prep is doing fairly quick leg yield zig zags in both directions in warm up and make sure he is reacting to my right leg... like 3 steps right, 3 steps left, 3 steps right, 3 steps left).
- Go DEEP into the corner
- Start the change of bend in the first to middle part of the corner
- Yes, we said earlier to start with the shoulders leading but there's no time with the zig zag so get the haunches out quick and half halt on the outside (right) rein.
- Aim for just before X. If I wait until X, then I run out of time to get back to H.
- Just before X, start changing the bend, but LET GO OF THE LEFT REIN (the new outside rein) so that I don't shut him down.
- Look at the letter (Cindy!!) and aim for it
- Almost lift my new inside (right) hand to get the bend. He doesn't like to bend as much to the right. And once we've got the leg yield, then I can half-halt on the left rein to keep the shoulders straight.
- Get him reactive and off my right leg.
- Keep the momentum going, although it is much easier to stay forward when I'm not shutting down the left rein.
So.. yep. That's all. 9 easy steps for the leg yield zig zag. Ha!! Doh! But... it did really help and smoothed out the leg yields for us tremendously.
Then we worked a little bit on the trot lengthen. Beth was saying that I was pushing him too far and going past his point of being strong enough to hold it so then he was tipping on the forehand and running. And like with my lesson with Cindy earlier... I had to control that right side from going way too long and out of control. So.. Beth had me sit and really collect him in the corner and then BUILD to the lengthening. However, building doesn't just mean keep building. At some point I have to realize we're there (for where he's at now) and half halt and balance. And actually.. it's a quite decent lengthening. Sure.. he could sit and push and be bigger, but it feels more correct, even though it's smaller. I also focused on lifting my sternum and thinking of lifting his withers. I had to lift my hands a little bit too because I would drop them and shut him down.
So yep.. Good ride. Then we went for a short little cool off hack and found the other set of trails. We'll have to explore that next time!


No comments:
Post a Comment